Homemade Jam Ratio

Nolan O'Connor
27-08-2026
 · Food Team
Hello, and welcome. Most people think jam is complicated, but the basic version is much more manageable than it sounds.
If you start with ripe fruit, granulated sugar, lemon juice, and a little patience at the stove, you can turn a bowl of chopped fruit into a thick, spoonable jar that keeps the fruit taste clear. A good starting point is 2 pounds of fruit, 1/2 to 1 pound of sugar, and 1 to 2 tablespoons of lemon juice.
That range matters, because strawberries and peaches usually need a different balance from tart plums or blackberries, and you can adjust based on how sweet the fruit already is and how firm you want the final jam to set.
The ratio sets the tone
The expected rule is lots of sugar, but you do not need to bury the fruit in it. For 2 pounds of prepared fruit, using 1/2 pound of sugar gives you a looser, fresher-tasting jam, while 1 pound gives you a firmer, more traditional set. That means if your berries are very sweet, you can stay near the lower end. If your fruit is watery or quite tart, moving closer to the higher end makes sense. Lemon juice is not just there for taste. With 1 to 2 tablespoons, it brightens the fruit and helps the jam set more reliably, especially with fruits such as strawberries or peaches that do not naturally firm up as easily as apples.
Easy picnic food combos that stay fresh, travel well, and keep your meal balanced outdoors
What peaches contain, how they may support health, and how you can pick ripe ones with less guesswork
A simple home method for cabbage rolls that stay tight, cook evenly, and do not fall apart
Crisp herbs, citrus, and a simple dressing keep avocado salad light instead of heavy.
Fresh basil, lemon, sugar, and ice come together in a cold, bright drink you can make fast.
No pie pan? No problem! This rustic strawberry galette comes together so easily!
What you need on hand
You do not need special equipment to start. A large heavy-bottomed saucepan is the key piece, because fruit foams and bubbles as it cooks and you need room for that movement. You will also want a wooden spoon or heatproof spatula, a cutter, a cutting board, measuring cups or a scale, and a few clean jars with lids. The fruit should be washed, trimmed, pitted if needed, and chopped into small pieces. For strawberries, that means hulling and quartering. For apricots, it means removing the pits and cutting the flesh into chunks. Keeping the pieces fairly even helps them cook down at the same rate.
Cook it until it changes
Start by combining the fruit, sugar, and lemon juice in the saucepan. Some cooks let the mixture sit for a few minutes so the fruit begins releasing juice, and that makes the first stage of cooking easier. Set the saucepan over medium-high heat and bring everything to a boil, stirring often. At first, it will look thin and foamy. Keep going. As the fruit softens, the bubbles get thicker and slower, and the spoon will start leaving a brief path across the bottom of the saucepan. That change is what you are watching for. In many batches, the cooking time lands around 20 to 30 minutes, though softer fruit can move faster and wetter fruit can take longer.
The plate test keeps you honest
Guessing leads to runny jam, but one small test gives you a much clearer answer. Before you start cooking, put a small plate in the freezer. When the jam looks thick, drop a little onto the cold plate and wait a moment. Push it with your finger. If it wrinkles and holds a line, it is ready. If it runs back together quickly, cook it a few minutes more and test again. This matters because jam keeps thickening as it cools in the jar. If you stop too late, the texture can turn stiff and sticky instead of soft and spreadable.
Small details make it better
Skimming foam from the surface gives you a clearer finished jar, especially with strawberry jam, where pale foam is easy to notice. Stirring regularly keeps the fruit from catching on the bottom of the saucepan, and a wide pan helps water cook off faster than a narrow deep one. If you want a smoother texture, mash the fruit during cooking with the back of a spoon or a potato masher. If you want more texture, leave larger pieces in place. One practical swap also works well here: if the fruit is very tart, such as blackberries, you can use the higher end of the sugar range rather than changing the method itself.
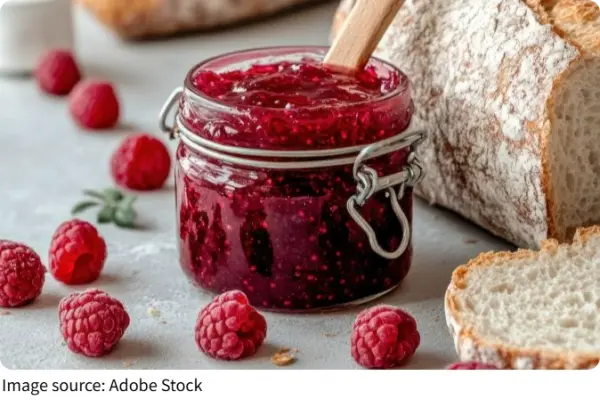
Let the finished jam cool briefly, then spoon it into clean jars. Once cooled, store it in the refrigerator and use it within a few weeks, or preserve it with proper canning if you want it shelf-stable. It is good on toast, folded into plain yogurt, or spooned over warm biscuits. If your first batch comes out a little loose or a little firm, that is normal. The next saucepan is easier because you will already know how your fruit behaves. So start with the 2-pound fruit base, adjust the sugar between 1/2 and 1 pound, and trust the texture changes in the saucepan, because that is what helps you make jam that tastes like the fruit you started with.